How to Connect Guidelines Rulers
Easily Align & Connect Guidelines Rulers
- Made of virtually unbreakable Polycarbonate
- Built-in Handle
- Built-in Lip Edge that aligns rulers
Want to know the difference between this and the other Connectors by Guidelines4Quilting. Click Here.
End to End, Side by Side or as a Corner Square
You can make a 6"x24" to cut the full width of fabric or connect them side-by-side to cut wider pieces. You can even make a Corner Square to square up but taken apart, they will fit in a small bag or even in the case with your sewing machine.
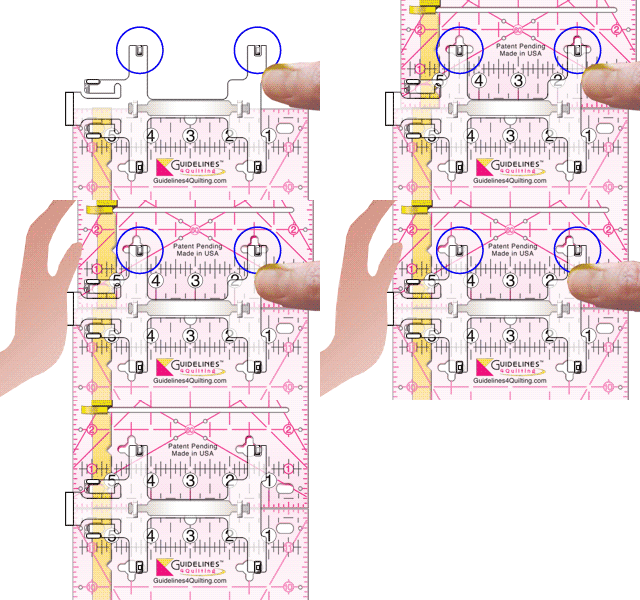
1) Insert the Tabs on the ends of both lower arms on the Connector into the center of the holes in the ruler.

2) Push on both arms and slide the Connector to the right until you hear a click to lock it onto the first Ruler.

3) Insert the Tabs on the upper arms into the center of the holes in the 2nd ruler. Hold the Connector in place on the 1st ruler and slide the 2nd ruler to the left up against the Lip Edge.

How to Take the Rulers Apart
Squeeze the Release Lever Extensions on the end of the Connector together and slide the top ruler to the right until the tabs are back in the center of the holes.
Then you can lower the ruler and pull it away. Squeeze the extensions again to take the Connector off the other ruler.

Sometimes a 3-Foot Ruler is Just What You Need.
It would be great to have a 3-Foot Ruler to cut bias binding strips. But who wants to pay for another ruler that long? Besides, carrying or storing it would be a major hassle.
Make a 3-Foot Ruler with the 3-Ruler Set that includes three Guidelines Rulers and two Guidelines Ruler Connectors. You'll have a 3-Foot Ruler when you need it, but it will still fit in a small bag or drawer when taken apart.
