Quilt Ruler Upgrade Kit
Zero Fabric Waste Starts Here
Quilt Ruler Upgrade Kit
Zero Fabric Waste Starts Here
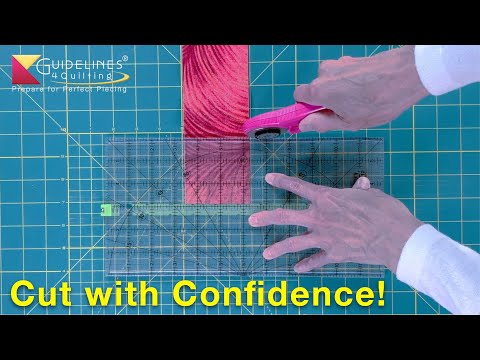
Cut With Confidence
No Slipping. No Guesswork.
Loretta Peterson’s
Facebook Comment
"I ordered the Upgrade Kit and extra Grip Strips and wouldn’t believe they would work. BUT they proved to be just as awesome as the ad states.
I am 88 and at 84 decided to start quilting and believe me my first attempt would have turned out much differently if I had the Guide then... My lines are straight and my points match up and so on. Thank you, Guidelines!"
Dava Brothers / Phoenix, AZ
"I use the 24” ruler guide every day
to cut endless strips of fabric for
my fabric wrapped rope bowls.
These are measured at 1⅛” wide.
The ruler guide gets it right
every time with no slippage."

Quilt Ruler Connector
(Also use as a handle)
Do more with your rulers!

The Kit Contents
1) Six Grip Strips (11¾” long)
Crystal Clear
Repositionable
No Sticky Residue
2) Two Guide Lock Strips
(paper-thin textured strips)
prevent the 24" Fabric Guide
from shifting in the middle
while cutting fabric
3) Two Fabric Guides
with Stretchy Bands
Clip on & Slide to the measure-
ment line you want
standard ⅛" thick quilt rulers with no lip edge
(Rulers are not included in the kit.)
No Slipping! No Eyeballing!
No Fabric Waste!
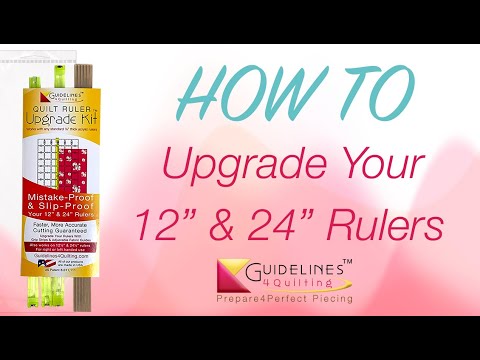
Watch this 1.5-minute tutorial video to learn
Three easy steps for setting up
Loretta Peterson’s Facebook Comment
"I ordered the Upgrade Kit and extra Grip Strips and wouldn’t believe they would work. BUT they proved to be just as awesome as the ad states.
I am 88 and at 84 decided to start quilting and believe me my first attempt would have turned out much differently if I had the Guide then. I love everything about the Guide and have put Grip Strips on my smaller rulers, too. My lines are straight and my points match up and so on. Thank you, Guidelines!"
Quilt Ruler Upgrade Kit
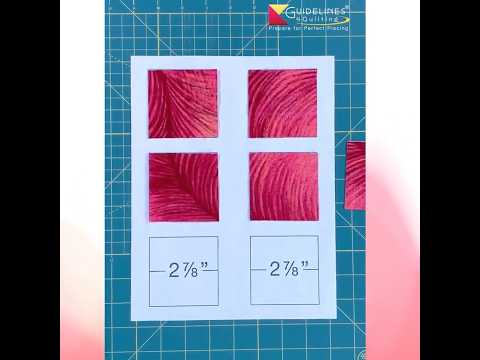
The video shows how to cut strips, using
the Quilt Ruler Upgrade Kit and Quilt Ruler Connector:

Dava Brothers / Phoenix, AZ
"I use the 24” ruler guide every day to cut endless strips of fabric for my fabric wrapped rope bowls.
These are measured at 1⅛” wide. The ruler guide gets it right every time with no slippage."
Quilt Ruler Connector / Handle:
Square up accurately
Cut wide or longer pieces
Use it as a handle on a single ruler or template
The Quilt Ruler Upgrade Kit Contents:
For Both Right and Left-Handed Use.
Works with 12" / 12½” and 24" / 24½” rulers of any brand that are ⅛" thick.
*** Scroll Down for Three Simple Steps to Use the Kit. ***
Grip Strips
to slip-proof your rulers.
Guide Lock Strips
for your 24" ruler
Fabric Guides
to catch fabric's edge.
Grip Strips and Fabric Guide work together,
so your ruler won't wobble while cutting.

Grip Strips also
slip-proof your rulers:
Grip Strips also
slip-proof your rulers:
Three Steps to Upgrade Your Rulers:
Step 1: Peel & Stick Grip Strips on Your 12" & 24" Rulers.
Six strips are included in the Kit. Two for your 12" ruler and four for your 24" ruler.
Peel crystal clear Grip Strips (11¾” long) off the brown backing paper.
Perfect!
Attach them as close as possible to the edges of your ruler.
Attach on both edges, so your ruler won't tilt in one side.
Don't skimp on them. When you leave a gap in between, it will cause ripples in your fabric.
Step 2: Attach Guide Lock Strips on Your 24" Ruler.
Step 2:
Attach Guide Lock Strips Underneath Your 24" Ruler.
Guide Lock Strips keep the long, 24” Fabric Guide, from shifting in the middle underneath your ruler no matter how much fabric you are lining up to.
Note: You don't need them on your 12" ruler.
Guide Lock Strips come with permanent adhesive.
Get extra strips here if you have more than one 24" ruler or in the case your ruler breaks.
Step 3: Clip the Fabric Guides onto Your 12" & 24" Rulers.
Important: Keep the Fabric Guides Straight.
The Fabric Guides are made of tough polypropylene, but they have to be very thin to fit under your ruler. Be sure not to bend them when you slide them on or slide them off.
Three Simple Steps to Upgrade Your Rulers:
Three Steps to Upgrade Your Rulers:
Step 1: Peel & Stick Grip Strips on Your 12" & 24" Rulers
Step 1: Peel & Stick Grip Strips on Your 12" & 24" Rulers.
Six strips are included in the Kit. Two for your 12" ruler and four for your 24" ruler.
Peel crystal clear Grip Strips (11¾” long) off the brown backing paper.
Use two for your 12" ruler and four for your 24" ruler.
Perfect!
Attach them right up to the both edges, but not beyond
Attach them as close as possible to the edges.
Attach on both edges, so your ruler won't tilt in one side.
Don't skimp on them.
When you leave a gap, it will cause ripples in your fabric.
Perfect!
Attach them as close as possible to the edges of your ruler.
Attach on both edges, so your ruler won't tilt in one side.
Don't skimp on them. When you leave a gap in between, it will cause ripples in your fabric.
Step 2: Attach Guide Lock Strips Underneath Your 24" Ruler
Step 2: Attach Guide Lock Strips on Your 24" Ruler.
Step 2:
Attach Guide Lock Strips Underneath Your 24" Ruler.
Guide Lock Strips keep the 24” Fabric Guide from shifting in the middle underneath your ruler no matter how much fabric you are lining up to.
Note: You don't need
them on your 12" ruler.
Guide Lock Strips come with permanent adhesive.
Get Extra Strips
if you have more than
one 24" ruler or if
your ruler breaks.
Guide Lock Strips keep the long, 24” Fabric Guide, from shifting in the middle underneath your ruler no matter how much fabric you are lining up to.
Note: You don't need them on your 12" ruler.
Guide Lock Strips come with permanent adhesive.
Get extra strips here if you have more than one 24" ruler or in the case your ruler breaks.
Step 3: Clip the Fabric Guides onto Your 12" & 24" Rulers
Step 3: Clip the Fabric Guides onto Your 12" & 24" Rulers.
Important: Keep the Fabric Guides Straight.
The Fabric Guides are made of tough polypropylene, but they have to be very thin to fit under your ruler. Be sure not to bend them when you slide them on or slide them off.
Clip the Fabric Guides on your 12" & 24" quilt rulers
and slide them to the measurement lines you want.
Important: Keep the Fabric Guides Straight.
The Fabric Guides are made of tough polypropylene, but they have to be very thin
to fit under your ruler. Be sure not to bend them when you slide them on or slide them off.
Note: The hooks on the ends of the Fabric Guides will be sliding over the markings on the ends of your ruler, so you may want to put strips of tape right along both edges underneath your rulers to protect the markings there as well.
Also some quilt rulers such as Fiskars' are slightly thinner than standard rulers that are ⅛" thick, so the Fabric Guides may stay put better if you put tape on both short ends.
Spare Parts
Fabric Guides need to be used together
with Grip Strips for accurate cutting
12" Fabric Guide
24" Fabric Guide
Guide Lock Strips
for your 24" rulers
with permanent adhesive
You can always use extra for all
the rulers and templates you have.
3 Steps to Use the Kit
Step 1
Peel & Stick Grip Strips
on your 12" & 24"
(or 12 ½" & 24 ½") Rulers
Step 2
Attach Guide Lock Strips underneath your 24" or 24 ½" Ruler between 9" &10" lines and 14" & 15" lines.
Guide Lock Strips keep the 24” Fabric Guide from shifting in the middle underneath your ruler no matter how many layers of fabric you are lining up to.
Note: You don't need them
on your 12" ruler.
Guide Lock Strips come with permanent adhesive. Get extra strips here if you have more than one 24" ruler or if your ruler breaks.
Step 3
Clip the Fabric Guides on
your 12" & 24"
(or 12 ½" & 24 ½") Rulers.
Clip the Fabric Guides on your 12" & 24" quilt rulers and slide them to the measurement lines you want.
The Fabric Guides are made of tough polypropylene, but they have to be very thin to fit under your ruler. Be sure not to bend them when you slide them on or slide them off.
![]()
![]()